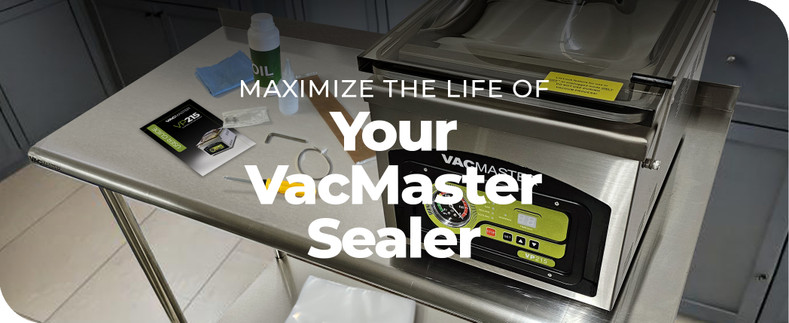
VacMaster Chamber Sealer Maintenance Guide: Keep Your Machine Running Smoothly


Table of Contents
Understanding Your Chamber Sealer
Oil Pumps vs. Dry Pumps
- Oil Pumps: Ideal for high-demand environments, oil pumps run quietly, generate less heat, and operate continuously. However, they require regular oil changes every 250 cycles or three months to maintain performance.
- Dry Pumps: Maintenance-free design and perfect for home users. Dry pumps generate more heat and noise, needing cooldown periods after 8–12 cycles. Regular inspection of the lid gasket for wear is necessary to maintain a proper seal.
Gas Flush Capacity
Gas flush enhances product shelf life and appearance by replacing oxygen with gases like nitrogen to extend shelf life and protect delicate items like baked goods and pasta. This anaerobic packaging process helps prevent bacteria growth and preserves color of product. Regularly inspect gas lines and nozzles for blockages to keep this feature running smoothly. Applicable Models: VP545, VP680, VP600, VP800.
Maintaining Oil Pump Models
Routine Maintenance
Routine oil pump care is crucial for strong vacuum pressure and a long-lasting machine.

- Routine Maintenance: Change oil every 250 cycles or three months, whichever comes first. Replace filters every 3 years or earlier if contaminated.
- Signs oil needs changing: Look for dirty, milky oil, debris, or weak vacuum performance.
Oil Change Procedure
- Keeping up with oil changes ensures a healthy pump and strong vacuum pressure.
- Follow the oil change instructions in your owners manual. Refer to our oil change guide for when to change your oil.
Troubleshooting Common Issues
- Weak Vacuum: Likely due to dirty oil or a leak in the machine. Check for leaks by running a cycle without a bag and observing the gauge:
- Leak Test (not applicable on VP95):
- Set vacuum time to 30 seconds.
- Close the lid (no bag required) and start the cycle.
- When the display reads "5," turn the machine off with the main power switch.
- Observe the needle on the gauge—if it moves toward the red, there's a leak and you will need to contact customer support.
- Pump Overheating: Keep oil levels consistent for a clean operating environment.
Maintenance for Dry Pump Models
Gas flush systems are excellent for extending product freshness, but they require specific care.
Routine Maintenance
- Daily Care: Inspect the lid gasket regularly for wear or damage. Clean the chamber and seal bars after each use.
- Common Troubleshooting:
If vacuum pressure drops, perform a leak test similar to oil pump models.
For error codes like “F1,” check the lid, micro switch, or startup procedure. Most commonly the F1 code displays because the lid is in the locked position when the machine is turned on. Turn off the machine, move the locking bar forward, and lift the lid. Turn the machine on.
Gas Flush Systems: Special Maintenance Tips
Gas flush systems are excellent for extending product freshness, but they require specific care.
- Inspect gas lines and nozzles regularly for blockages.
- Perform test cycles to fine-tune gas flush settings for your product.
Required Tools & Materials For Setup
Dual-Stage Regulator:
Reduces pressure to 7–12 PSI to avoid damaging the machine.
Must be purchased to avoid damaging equipment
Gas Tank:
Select size based on usage; consult your local gas supplier.
Hoses & Clamps:
3/8" hose and adjustable hose clamps to prevent disconnections.
Maintenance Tips
- Inspect gas lines and nozzles regularly for blockages.
- Perform test cycles to fine-tune gas flush settings for your product.
Troubleshooting Gas Flow Issues
- Ensure proper regulator settings.
- Check hoses for leaks or blockages.
General Maintenance for All Chamber Vacuum Sealers
Some maintenance steps apply universally across all VacMaster Chamber Sealers.
- Daily Care: Inspect the lid gasket regularly for wear or damage. Clean the chamber and seal bars after each use.
- Seal Bar Maintenance: Replace worn-out seal bars or seal bar tape and calibrate seal time to match bag materials.
Common Error Codes and Fixes
- "_ _": Machine ready to run a cycle.
- "ED": End of demonstration; ready to run a cycle.
- "F1": Cycle issue; check lid or micro switch.
- Causes:
- Turned the machine on with the lid closed.
- Running a cycle with the lid latch on.
- Lid shocks don’t open the lid all the way after a cycle is completed.
- Bad micro switch.
- "Co": Oil change required; change oil and reset the machine by holding "set" and arrow buttons for 3 seconds.
- Change the oil.
- Press and hold the “set,” “up arrow,” and “down arrow” at the same time for 3 seconds.
When to Contact Tech Support
If your VacMaster Chamber Vacuum Sealer continues to have issues, it may be time to seek professional assistance:
- Persistent vacuum issues after troubleshooting.
- Leaks that cannot be resolved with a gasket replacement.
- Recurring error codes despite corrective actions.
Reliable Performance Starts with Regular Maintenance
By incorporating these maintenance practices into your routine, you’ll keep your VacMaster Chamber Vacuum Sealer running at its best for years to come. Whether you’re a home cook, sportsman, or commercial operator, regular care not only protects your investment but also provides reliable sealing every time.
For additional guidance, feel free to reach out to our dedicated support team. We’re here to help you make the most of your VacMaster experience!
