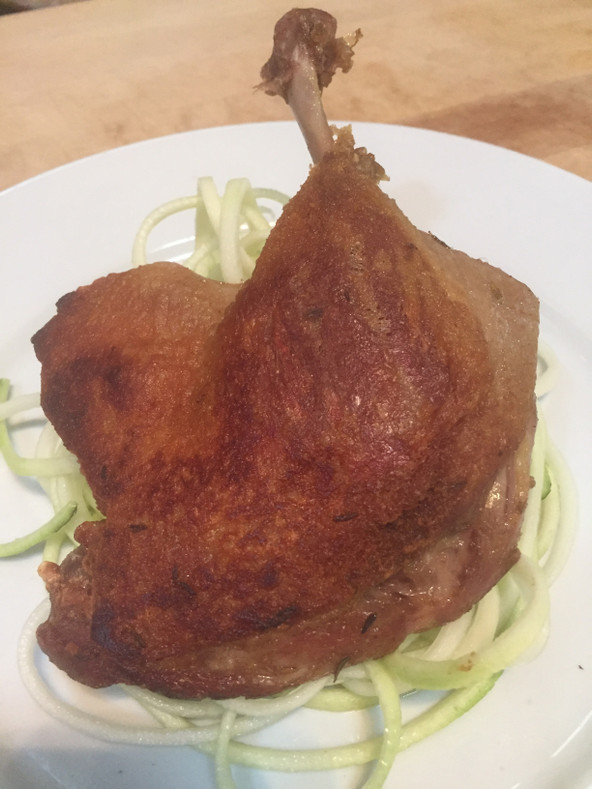
Confit of Duck Legs Sous Vide

| The word confit (con-fee) comes from the French, confiture or preserves and can be culinarily applied to countless food groups. For our purposes here confit will be referring to one of my favorite preparations, confit de canard or preserved duck. As I have mentioned in the past I had the amazing opportunity to spend some time in France as a culinary student and it was during my time in the south-west, a town called Sarlat that I had one on my first culinary epiphanies. |
| Confit of duck and/or goose is a farmhouse staple that has found its way into countless classic dishes or just simply served on its own. This classic technique is considered a way of life on French farms rather than just a textbook technique. The idea is simple, salt the meat to remove excess water (to prevent spoiling and consequently intensify flavors) season, then cook or rather poach the meats in cauldrons of its own fat. When done the cooked meat is sealed in its own fat then stored in a cool, dark place like roots cellars and the like. The confit method which predates refrigeration is one of the oldest ways to preserve food and originally was just used as a preservation technique. Turns out that the preserved meat is so exquisitely flavored and textured that not only does it preserve exceptionally well but actually gets tastier as time goes by. You can use it right after cooking but well-made confit can last for days, weeks, months or even years all the while the texture and flavor continually improves. |
| The culinary caveats of updating this truly tasty technique to sous vide are significant. First and foremost, you are able to use MUCH less fat. Historically it can require pints of fat to properly cook and seal a handful of duck legs depending on the size and shape of the cooking and storage vessel used. Here in our sous vide version only a few tablespoons are necessary as the vacuum pouch evenly disperses the fat coating and sealing the meat beautifully. Another huge advantage is temperature control, the SV1 makes easy work of what can be an aggravating situation. Trying to tame the flame to keep the fat at a shimmer for hours at a time can be daunting at best. And of course storage, store up dozens of legs at a time or simply one in a vacuum sealed bag is infinitely easier than warming up an earthenware crock and fishing for duck legs when you’re hungry! |
| Ingredients: • 1 tablespoon kosher salt, or 1 1/2 teaspoons per duck leg • 2 duck legs, whole (leg/thigh combo) For cooking: • 2 large thyme, fresh, sprigs • 2 cracked bay leaves • 4 cloves, whole • 2 large garlic, cloves, peeled, stemmed and cracked • 1 tablespoon whole black peppercorns • 1/2 cup Rendered Duck Fat SV, see recipe, chilled |
|
| Directions: 1. Thoroughly rub the duck legs on all sides with the salt and using an appropriate sized VacMaster bag(s) place the duck with any of the remaining salt. 2. Using a VacMaster chamber or suction machine vacuum seal the bag and refrigerate for 8 hours. 3. Remove the duck from the bag and thoroughly rinse away the salt and pat dry. 4. Preheat the water bath of the SV1 to167°F / 75°C. 5. Using the VacMaster Bag Filler and appropriate sized VacMaster bag(s) place the duck legs, thyme, bay leaves, cloves, garlic, black peppercorns and chilled duck fat, using a VacMaster suction or chamber machine, vacuum seal. 6. Gently place the vacuum sealed bag in the water bath of the SV1 and cook for 12 hours. 7. Keep an eye out for the water level of the SV1 as the cooking time is long and the temperature is rather high depending on your set up you might want to cover your water bath with plastic wrap to minimize water evaporation. 8. After 12 hours remove the duck from the water bath. |
If serving immediately: 1. Gently remove the duck from the bag and strain the cooking liquid into a suitable vessel and discard the herbs. 2. Let the cooking liquid cool and separate into duck juices and duck fat, reserve and use each as needed. 3. Heat a nonstick skillet over medium-high heat with one tablespoon of the reserved duck fat 4. Add the duck legs, skin side down, and cook until well-browned and crispy about 3-5 minutes. 5. Flip the legs and brown the flesh side for 2-3 minutes. 6. Serve immediately Alternatively: 1. Place the bags from the SV1 immediately into ice water until thoroughly chilled then refrigerate and use as needed. |
|


